
Did you know that you can customize woocommerce order details page with Elementor pro? And move away from this basic design to any custom layout you can think of.
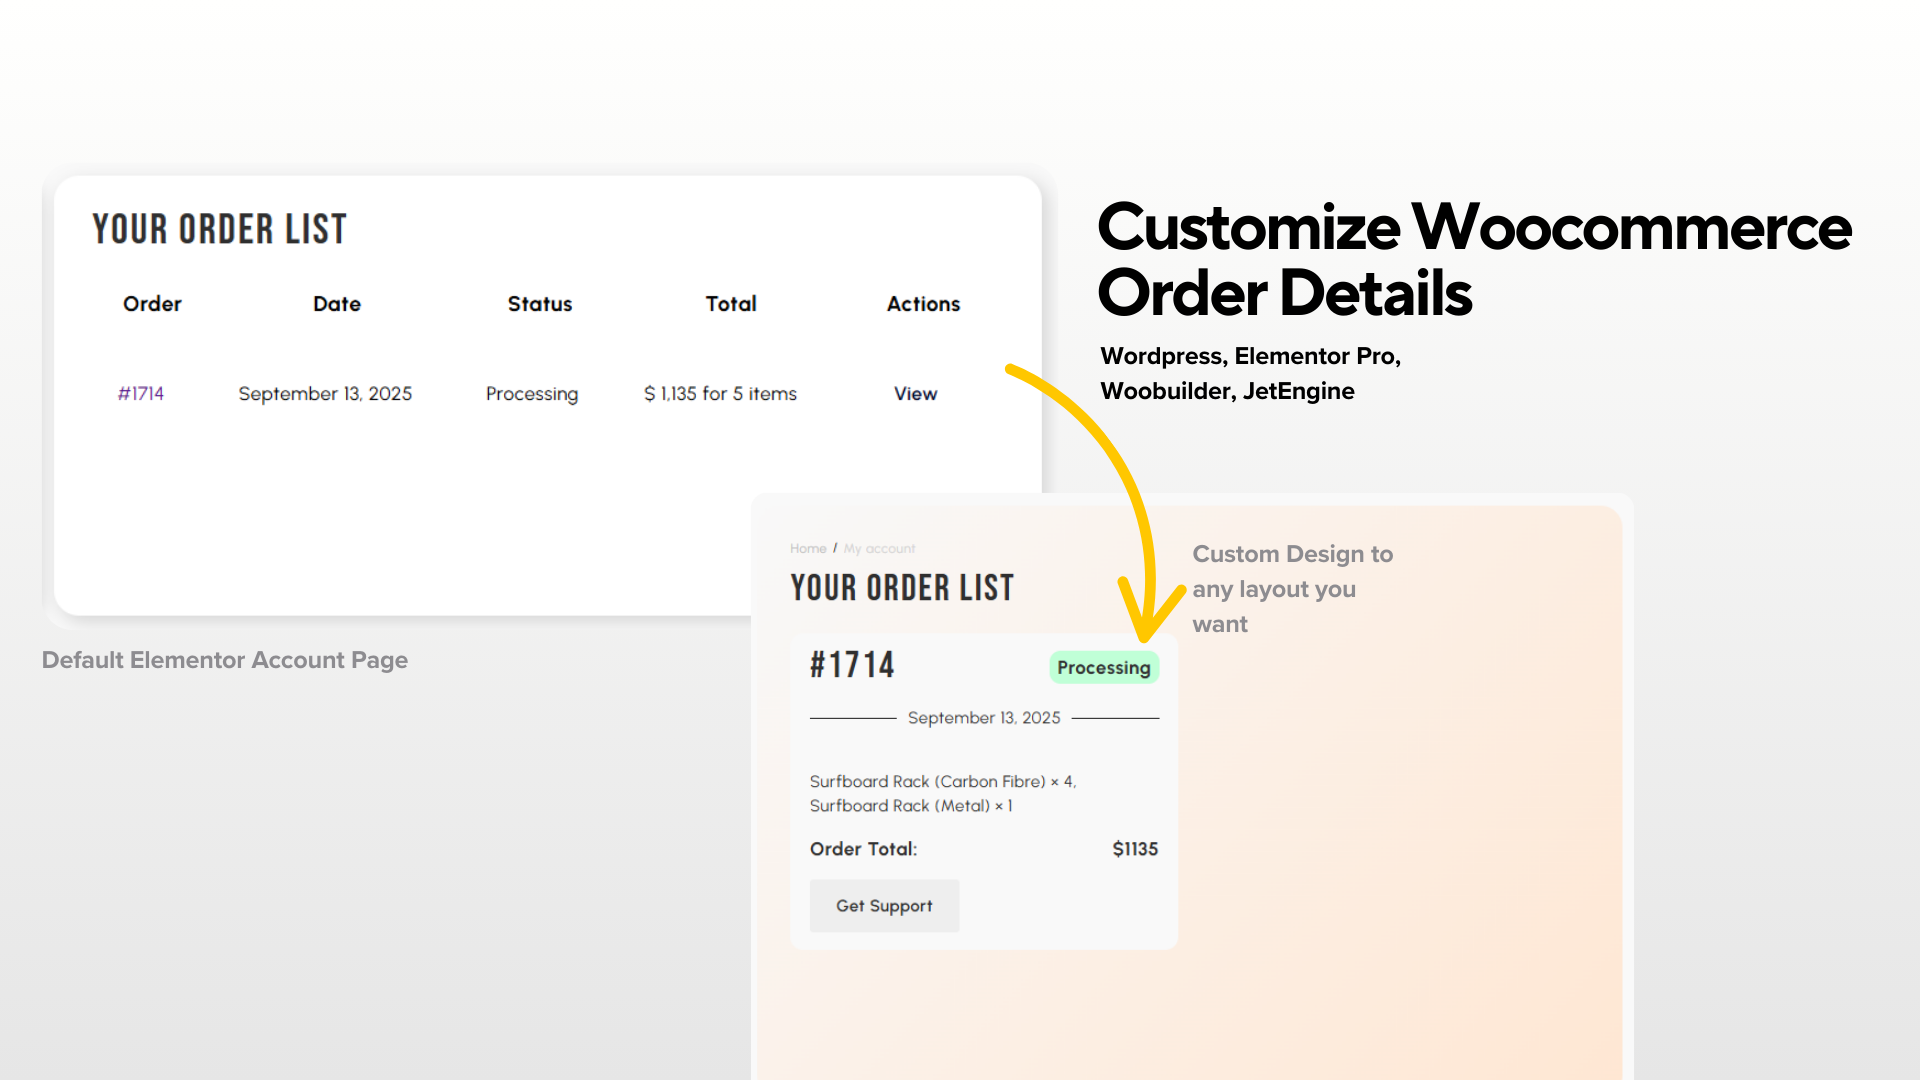
The main problem is Elementor Pro is you cannot use Loop grid to display order details on Account page. You also cannot control much styling when it comes to the provided Elementor Account widget. So you just end up with very limited options not being able to ultilize the full strength of Elementor Pro.
Most tutorials show the default /my-account/view-order/ page or heavy PHP templates.
Tired of the default /my-account/view-order/? To follow this tutorial you need some the following list of plugins which most Woocommerce builders already own the license to.
The plan is simple, we will create a custom query to pull data from Woocommerce database to dynamically display it on Elementor/woobuilder template. Once you are able to do that, you can create any type of design you want at your finger tips.
Elementor Pro
Crocoblock’s Jet Engine
Crocoblocks Woo Builder
I think the last two comes under the same license. Double check this.
Before you start: you should already have
JetWooBuilder is active and My Account custom endpoint should already be assigned with Woo builder. You should also already have placed a test order on your woocommerce account.
Step 1 — Pull woocommerce data dynamically to Elementor Pro using Jet Engine
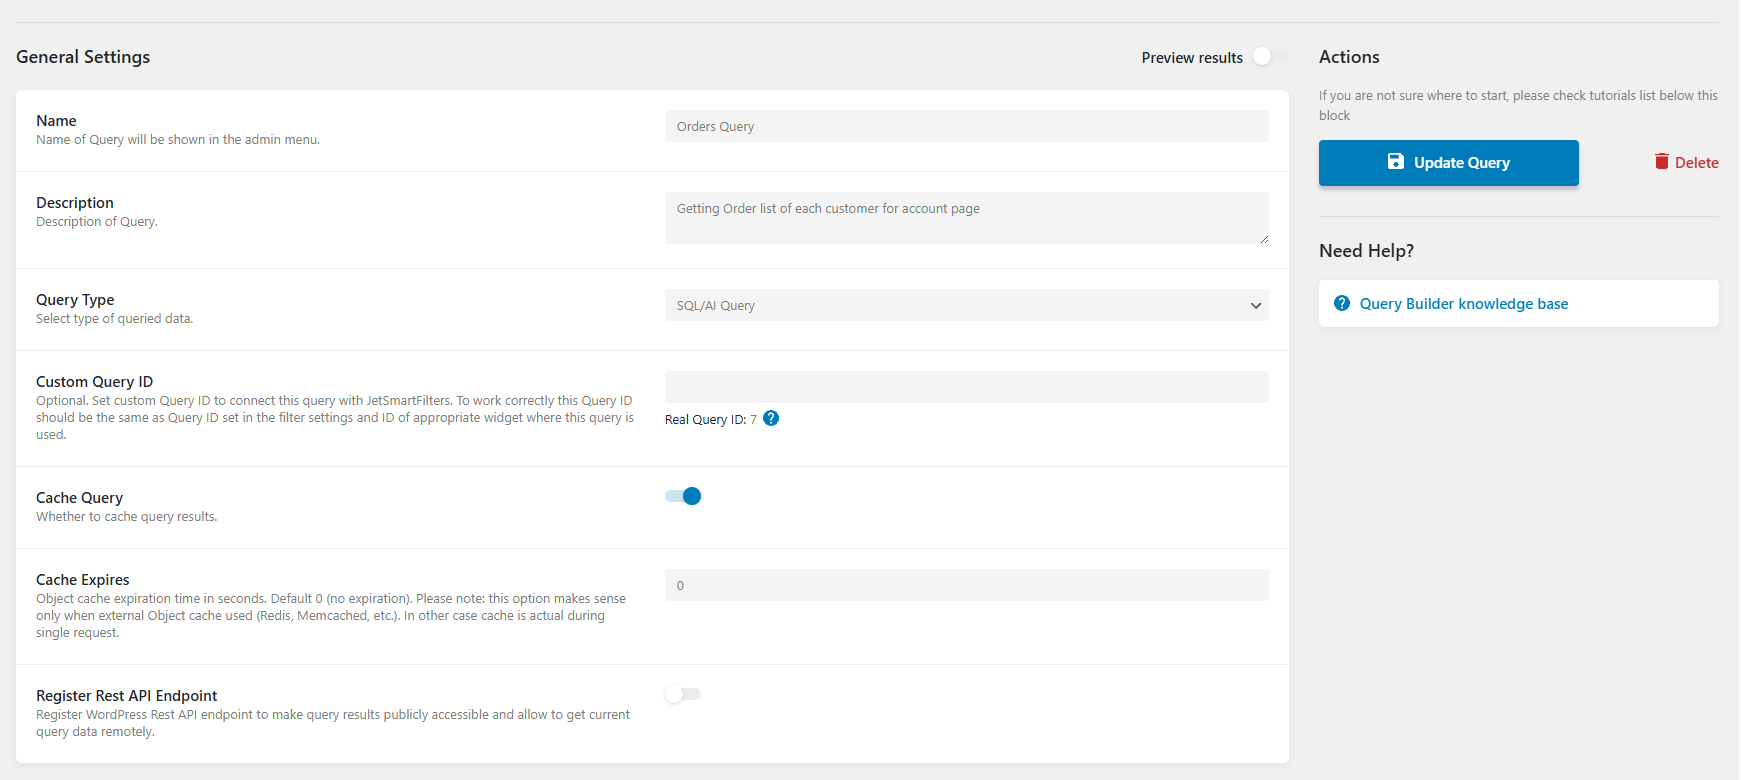
JetEngine → Query Builder → Add New → Query Type: SQL/AI Query → Advanced/AI mode.
We are going to create a new Query for your website. You can name it anything you want and add any description you want but this is how I did it. You can follow my settings.
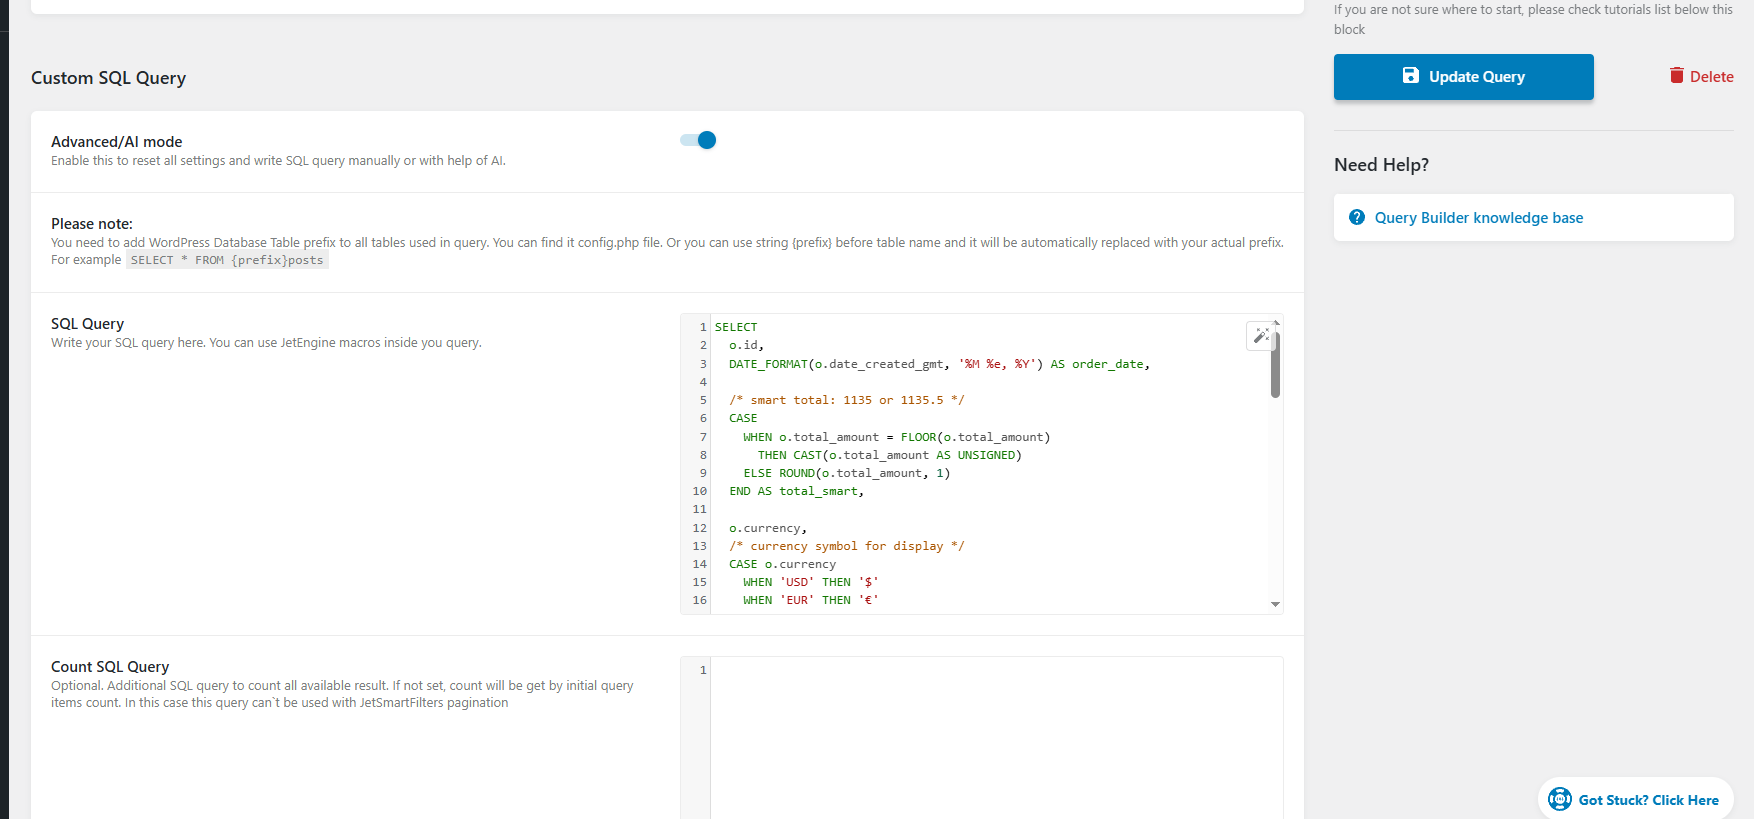
Paste the following code in SQL Query box:
**The following code does few things, the main function is to “collect” data from Woocommerce so you can dynamically display them on your Elementor. Other functions are like renaming currencies from USD to $ sign and order status from wc-pending to Pending.**
SELECT
o.id,
DATE_FORMAT(o.date_created_gmt, ‘%M %e, %Y’) AS order_date,
/* smart total: 1135 or 1135.5 */
CASE
WHEN o.total_amount = FLOOR(o.total_amount)
THEN CAST(o.total_amount AS UNSIGNED)
ELSE ROUND(o.total_amount, 1)
END AS total_smart,
o.currency,
/* show a symbol without code */
CASE o.currency
WHEN ‘USD’ THEN ‘$’
WHEN ‘EUR’ THEN ‘€’
WHEN ‘GBP’ THEN ‘£’
WHEN ‘THB’ THEN ‘฿’
WHEN ‘MMK’ THEN ‘K’
ELSE ”
END AS currency_symbol,
/* status (raw + pretty) */
o.status AS status_raw,
CASE o.status
WHEN ‘wc-pending’ THEN ‘Pending’
WHEN ‘wc-processing’ THEN ‘Processing’
WHEN ‘wc-completed’ THEN ‘Completed’
WHEN ‘wc-on-hold’ THEN ‘On Hold’
WHEN ‘wc-cancelled’ THEN ‘Cancelled’
WHEN ‘wc-refunded’ THEN ‘Refunded’
WHEN ‘wc-failed’ THEN ‘Failed’
ELSE o.status
END AS status_label,
o.payment_method_title,
o.billing_email
FROM {prefix}wc_orders o
WHERE o.type = ‘shop_order’
AND o.id = ‘%get%{“key”:”order_id”}’ — reads ?order_id=123
AND o.customer_id = ‘%current_user_id%{“context”:”default_object”}’ — secure: only owner can see
LIMIT 1;
once you have added. click save or update button on the right.
Step 2 — Build the Order Summary listing with Listing Grid widget from Jet Engine
First you have to go to your custom account details end point with Elementor Editor. If you are unclear, I am talking about the custom template you have created using Woobuilder. This is where we will create a listing to customize woocommerce order details page.
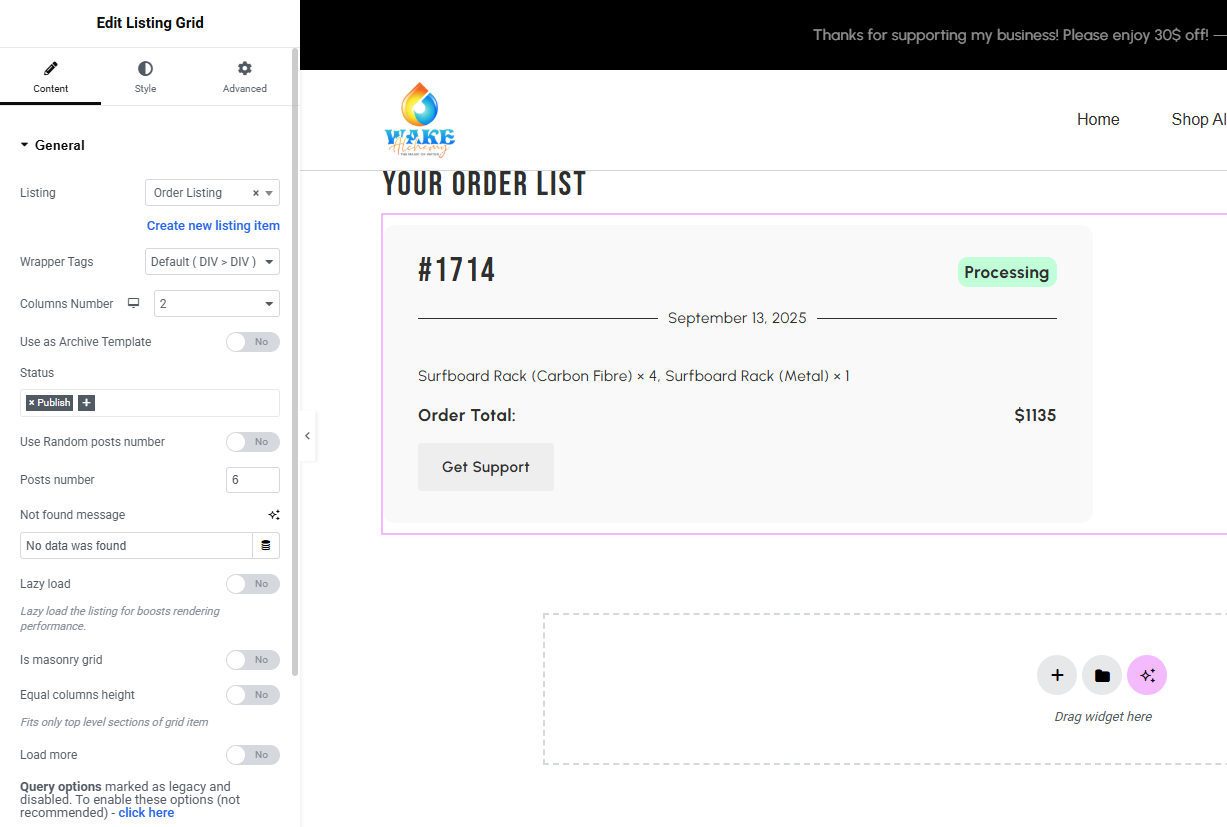
Once you are inside Elementor editor, add a listing grid widget. You should see a listing grid widget if you have Jet Engines installed. Add your listing grid. In the listing you click create listing item. (leave that for now we will come back later to create a custom template). The name doesn’t matter here. I call it Order Listing.
Important. At the bottom left of my screenshot you will see a blue button that says click here. Click it. We will disable legacy Query settings since we won’t rely on that today.
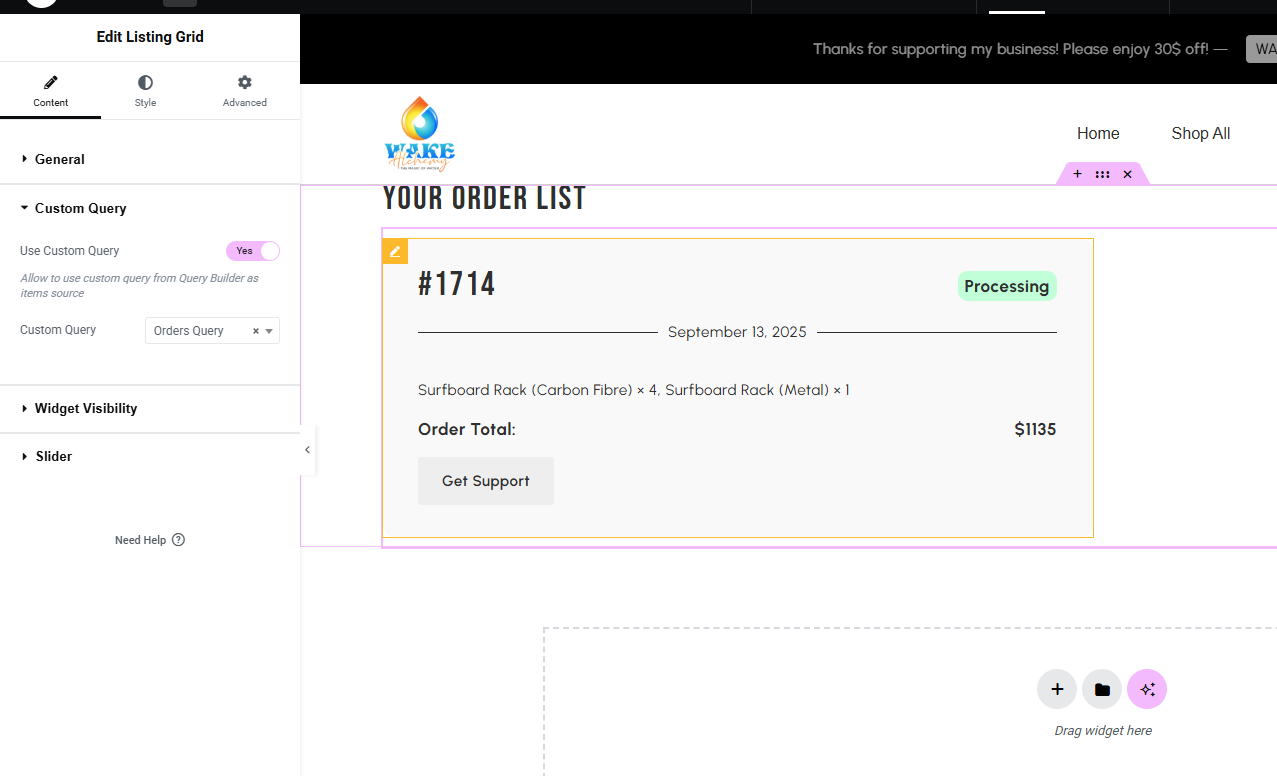
Scroll down on the left colum after that. You should see Custom Query like this. Make sure you turn it on and choose the query you just created. The name maybe different from mine depending on your naming.
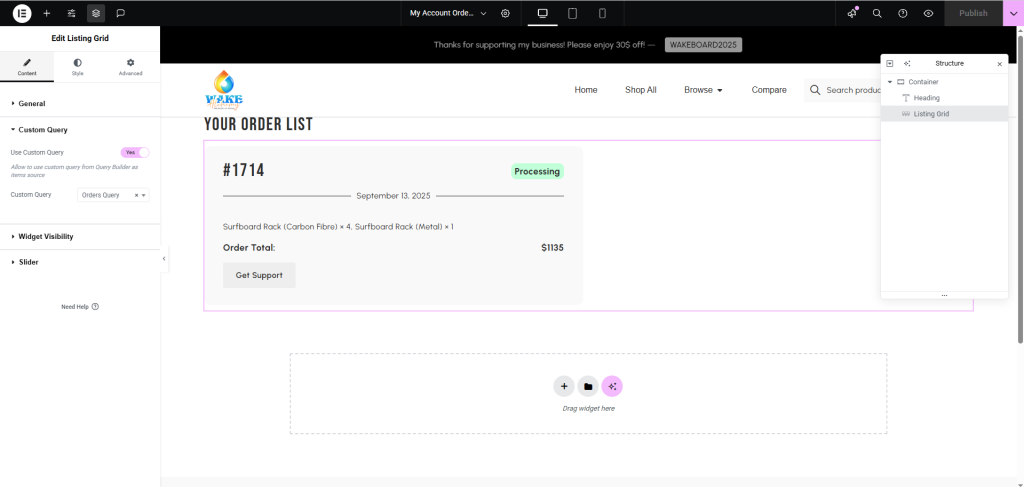
That’s all there is to this step. Publish it for now and we will move to our final step. Which is customizing the order details. If you are familiar with Elementor Pro, this is just like Loop Grid and Loop item. Instead here we are relying on Listing Grid and Listing item from Crocoblock, because it works really well with Jet Engine.
Step 3 – You can now customize woocommerce order details page
First you edit the listing item that you created earlier. It should be in a yellow selector. Like the image I provided below. (yours will be empty though)
Once you are in the listing item’s Elementor editor, I will show you how to create your first dyanamically pulled data.
Add Elementor Heading widget, we can worry about styles later.
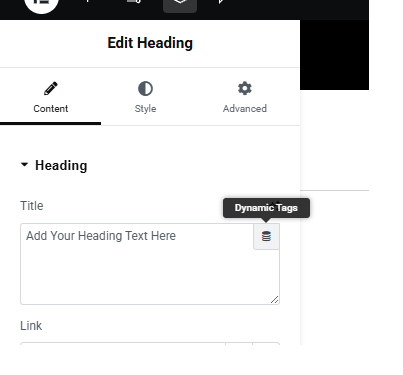
In the title box you will see Dynamic Tags button. It looks like a coin. Click on it > Scroll all the way down to find Current Object Field.
After you select that you will face another option to select more fields. This is where you can now pick what data you want to display on this heading widget. Make sure to scroll all the way down to find the query items that we just created.
To give you some idea:
Choose id > will display order id
Choose Currency symbol > will display $
Choose total_smart > will display auto rounded total order amount
Try it out have fun with Dynamic tags. From here yYou can now customize woocommerce order details page with Elementor Pro with any layout or style that you want and really harness the power of Jet Engine.